(245,’2006-09-08 12:00:00′,’figNoggle’,’2006-12-20 08:02:44′,’david’,’CNC Mill X-Axis Ball Screw Mounts and Testing’,”,’All parts were made using the figNoggle Designs’ CNC Converted Sieg X2 Mini-Mill. The rolled Thomson ball screw was turned on the Harbor Freight 8″x12″ mini-lathe (the same as Lathemaster’s 8″x14″ – just different colors, accessories, support, and price).
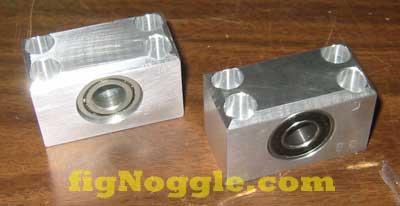
Most of the time was spent drawing up the parts and generating G-Code to run in Mach. There were a few “oops” moments, but for the most part, the bearing block and end mounts were machined really nicely – much easier than using a boring bar (maybe not as truly circular, but it’ll work for now). Virtually zero backlash (the worst was the Y-axis at 0.002″) mainly due to the gib strip making things difficult to tune right for the entire Y-axis travel. Anyway, here’s a picture of the bearing block and end mount. Since we’re usin just scrap parts and those readily available, the bearing block is using shielded ball bearings (aka “skate bearings”) and the end mount is using an unshielded, ungrounded ball bearing.
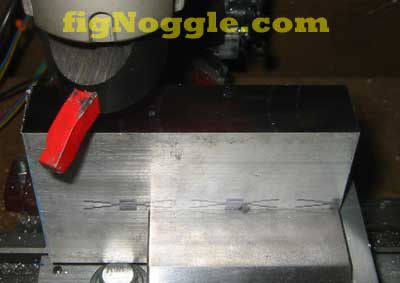
The first step was to use Mach and the CNC X2 mini-mill as a quasi-powerfeed in the X-Axis (with the belt drive conversion we made) to true up the important sides of the bearing block pieces. We took at most 0.020″ per pass.
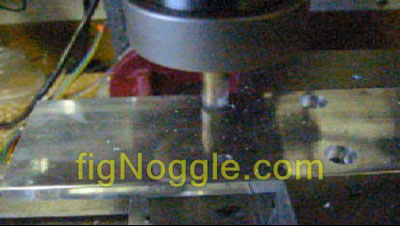
Here’s a quick clip of counterboring using peck-drilling code with a 3/8″ 2-flute end mill at 0.1″ per peck (click on the picture to view the video clip:
A few hours later, we were ready to put the ball nut on the ball screw – oops! The balls scattered all over the shop floor. It’s OK since it was time to try re-balling using the recommended method: insert the ball nut housing onto the ball screw, stick a dowel into one of the race holes and start inserting balls into the other hole and once the balls can’t be pushed in any further, put a few more into the race and insert and screw the clamp on – that should do it.
BTW, having a lathe larger than a 7x lathe helps when trying to turn a screw that’s over 2 feet long! Here’s a picture of the pieces layed out:
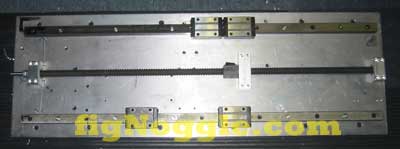
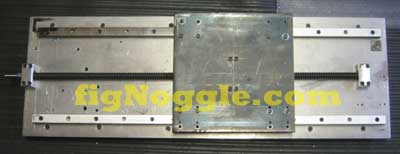
Then, it’s time to do some mount the pieces on the X-axis base and use the hand drill (after centerpunching, center-drilling, then drilling using a tap block to help make sure of plumb-ness) to drill then holes and then tap. After all this, we end up with the pieces fairly aligned, but ready to go:
Now it’s time to do some testing… we hooked up a 1000 RPM (at best) Sears Craftsman 19.2V cordless hand drill to the end of the ball screw shaft and tested the run (click on the picture to play a video):
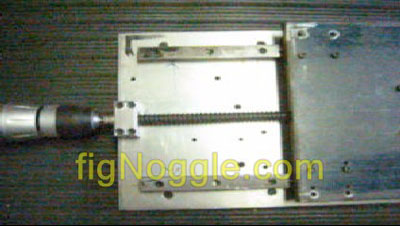
Pretty nice! But that’s with no load! What happens if someone sits on it with all of 200+ lbs. while running the same hand drill (click on the picture to view the video):

Still moves nicely! It’ll be some sight to hook it up to the Gecko 201 drive and run it as fast as possibly under Mach…
We’ll need to hook up the motor, so a NEMA 23 and 34 mount is being designed (plans will be offered for free) and we’ll CNC it using the mini-mill.
Now we move onto making the motor mounts!‘
‘,’
All parts were made using the figNoggle Designs’ CNC Converted Sieg X2 Mini-Mill. The rolled Thomson ball screw was turned on the Harbor Freight 8“x12” mini-lathe (the same as Lathemaster’s 8“x14” – just different colors, accessories, support, and price).
Most of the time was spent drawing up the parts and generating G-Code to run in Mach. There were a few “oops” moments, but for the most part, the bearing block and end mounts were machined really nicely – much easier than using a boring bar (maybe not as truly circular, but it’ll work for now). Virtually zero backlash (the worst was the Y-axis at 0.002”) mainly due to the gib strip making things difficult to tune right for the entire Y-axis travel. Anyway, here’s a picture of the bearing block and end mount. Since we’re usin just scrap parts and those readily available, the bearing block is using shielded ball bearings (aka “skate bearings”) and the end mount is using an unshielded, ungrounded ball bearing.
The first step was to use Mach and the CNC X2 mini-mill as a quasi-powerfeed in the X-Axis (with the belt drive conversion we made) to true up the important sides of the bearing block pieces. We took at most 0.020” per pass.
Here’s a quick clip of counterboring using peck-drilling code with a 3/8” 2-flute end mill at 0.1” per peck (click on the picture to view the video clip:
A few hours later, we were ready to put the ball nut on the ball screw – oops! The balls scattered all over the shop floor. It’s OK since it was time to try re-balling using the recommended method: insert the ball nut housing onto the ball screw, stick a dowel into one of the race holes and start inserting balls into the other hole and once the balls can’t be pushed in any further, put a few more into the race and insert and screw the clamp on – that should do it.
BTW, having a lathe larger than a 7x lathe helps when trying to turn a screw that’s over 2 feet long! Here’s a picture of the pieces layed out:
Then, it’s time to do some mount the pieces on the X-axis base and use the hand drill (after centerpunching, center-drilling, then drilling using a tap block to help make sure of plumb-ness) to drill then holes and then tap. After all this, we end up with the pieces fairly aligned, but ready to go:
Now it’s time to do some testing… we hooked up a 1000 RPM (at best) Sears Craftsman 19.2V cordless hand drill to the end of the ball screw shaft and tested the run (click on the picture to play a video):
Pretty nice! But that’s with no load! What happens if someone sits on it with all of 200+ lbs. while running the same hand drill (click on the picture to view the video):
Still moves nicely! It’ll be some sight to hook it up to the Gecko 201 drive and run it as fast as possibly under Mach…
We’ll need to hook up the motor, so a NEMA 23 and 34 mount is being designed (plans will be offered for free) and we’ll CNC it using the mini-mill.
Now we move onto making the motor mounts!‘
‘,”,”,”,’Home-Brewed-CNC-Vertical-Mill’,”,0,”,0,4,1,1,’article’,”,”,’cnc-mill-x-axis-ball-screw-mounts-and-testing’,”,”,”,”,”,”,”,”,”,”,’3c396377f9d140c3d350a914c97679d2′,’2006-09-08′);