Copyright 2011. figNoggle Designs.
7x10, 7x12, 7x14 Mini-Lathe Information Website Links
Post a link to your website or view other hobby and machine and metalworking websites for free.
|
|
Rent Mill & Lathe DVDs at Smartflix | Great aluminum & steel prices at OnlineMetals
SIEG X2 MINI MILL
- MINI
MILL HOME
- DRO
- CNC V1 - CNC V2
- STUFFMADE - REDUX
- HOW-TOS
HOW-TO Upgrade To ACME Leadscrews
And Acetal/Delrin Leadnuts (Y-Axis)
(there is another article on how to make anti-backlash acetal/delrin
leadnuts)
after modifying the brass nut to a
quasi anti-backlash type, it's time to take it further. i've decided to
use a rated ACME screw (+/- 0.003"in/ft) from nook and make my own acetal/delrin
nuts. why didn't i go with ballscrews? well, since our cnc conversion retains manual function, i didn't want to make the
travel too slippery. also, to use a ballnut you'd need to hack away at the
table carriage some and this wasn't the preferred method.
so, the combination of acme with a
smooth acetal/delrin nut which would be able to fit in the stock cavities
is the way to go. this page has the upgrade in pictorial format.
this page is rather long so we will only talk about
the Y-axis. to see the X-axis, click
here.
new! what is backlash and lead
accuracy?
| if you're just joining us, you can click here to go the beginning of
this modification. materials etc. are discussed. |
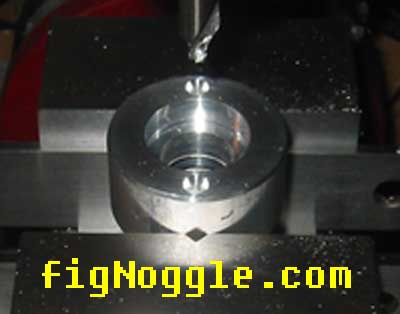
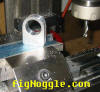
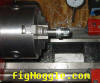
| here the bearing block is being drilled and prepped
for tapping after it was turned in the 8x12
lathe. |
 |
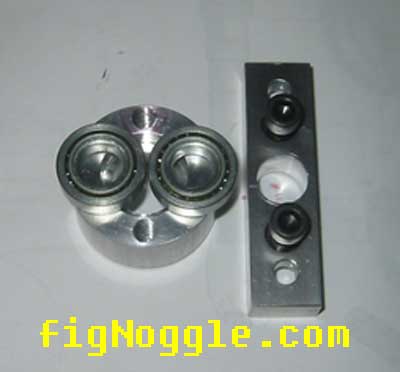
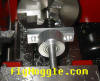
| here are the components to the new y-axis leadscrew
mount.
we are using two radial ball bearings
(aka "skate bearings"). since there is minimal thrust and side loads,
these inexpensive and small-sized bearings work great. |
 |
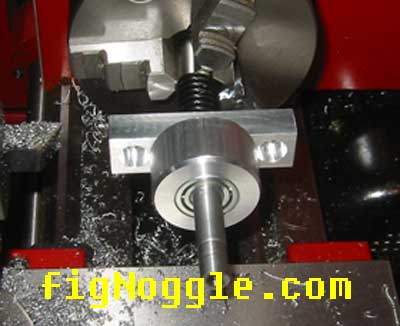
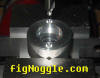
| here is the bearing block mount test fitted on the
turned leadscrew. |
 |
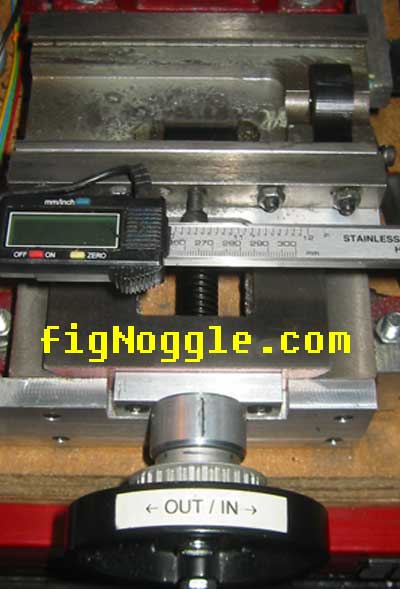
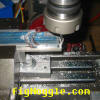
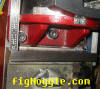
| setup for the slotting the keyway |
| this is a different setup for holding the leadscrew.
this time we used v-blocks held to the table to act
as the centering support for the leadscrew.
doing this makes it easier to work with the
z-travel limited by the torsion spring. (last time we had to temporarily
remove the spring). |
 |
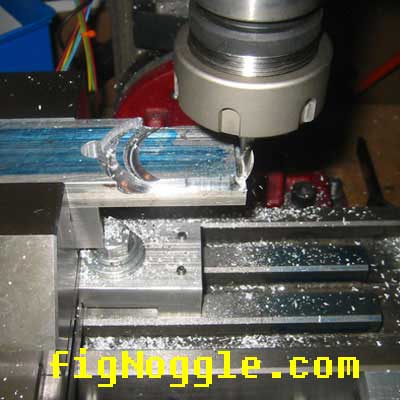
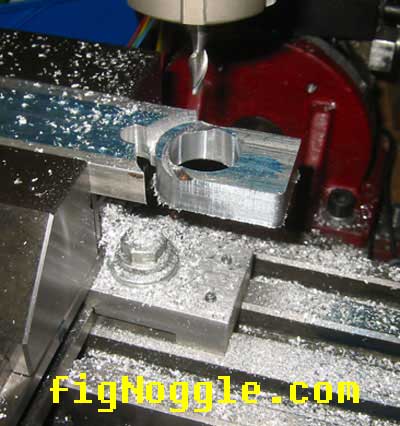
| the mini mill uses 4mm keys.
unfortunately, as we had done last time, a smaller
1/8" bit was used and many passes were made to achieve the right size. |
 |
| assembly |
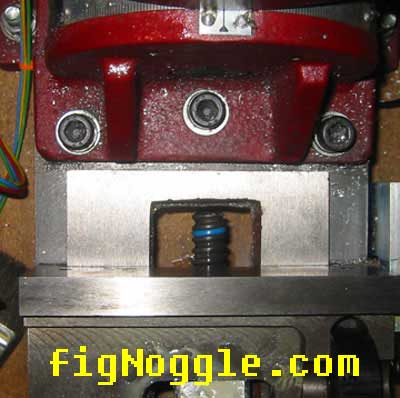
| here is a test fit of the assembly. with the
bearings, the movement is silky smooth. very nice!
now onto the acetal nut, the last and final step in
this upgrade.
we have come up with an anti-backlash acetal nut
that should be able to fit within the existing cavity of the mill.
whereas a ballscrew and ballnut combination
requires that the table/base cavity be milled out to accommodate the
ballnut and flange, the acetal nut can be made into any shape. |
 |
| the acetal nut is mounted.
this is the regular variety.
the anti-backlash version is being made. |
 |
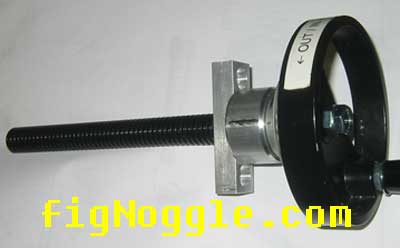
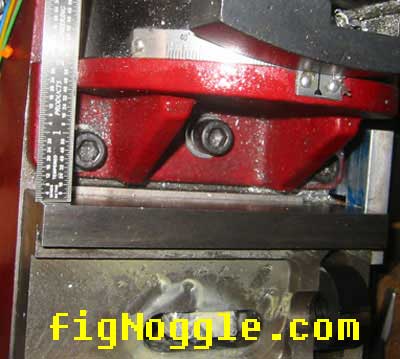
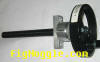
| here's the completed y-axis upgrade.
this is quiet a nice upgrade. it's not only quicker
to move the table since we've halved the screw pitch from 16tpi to 8tpi,
it's also smoother to operate due to the bearings in the new mount and the
acetal on metal contact.
even with the gibs tightened down fairly well, the
handle is easy to crank.
when connected back to the cnc assembly, we can
get very fast travel with no "lost steps" due to binding/torque.
we will be running some tests to show this data.
all in all, a very nice upgrade and it makes a
significant difference in the manual and cnc operation of this mini mill.
the only potential downside of this upgrade would
be 1. acetal nut wear (guessing here, but this is probably along the same
lines as the brass nut anyway) and 2. less finite travel per degree of
rotation (in actuality, a degree is a degree is a degree translated into
linear travel - it's just that it takes 1/2 the previously used handle
rotation to get the same amount of linear travel and this could be more
difficult on the human operator to get this sort of "feedback-resolution".
of course, since there's still a good amount of friction involved as
compared to a ballscrew setup, the operator can still "feel" his/her way
around well enough.) |
 |
| ballscrew upgrade |
| here's a ballscrew version of the upgrade in the
y-axis (for now).
this is the y-axis ballscrew.
after dulling two points of the carbide insert
this is what you get.
there may be a way to upgrade without drastic
modification to the table and base. |
 |
| using cnc, the y-axis ballnut flange is being
machined.
step1 |
 |
| step2. the mounting hole has already been cut out. |
 |
| here's a video clip of the cnc doing its thing |
click for video |
| this is not the best way (or even recommended).
the part really should be mounted better. |
 |
| here's the finished part.
there's significant y-axis backlash ~0.007" (the
acetal nut wasn't tapped as well as the x-axis one)
this nut took roughly 30 minutes using 5ipm feeds
with .040" depth of cut at 1500 rpm with a 1/4" 2 flute round mill. |
 |
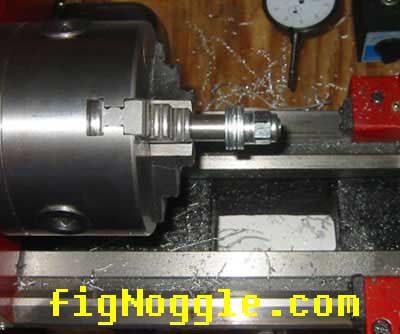
| washers needed to be turned down to diameter for the
y-axis bearing block.
the shaft was machined
and threaded at the end to accommodate these plain zinc washers. |
 |
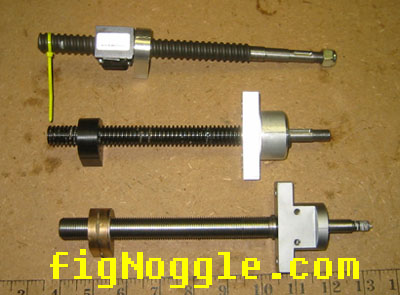
| ok. all three available types of leadscrew/nut
combination:
stock acme with the brass nut
upgraded acme with acetal nut
ground ballscrew and ballnut |
 |
| since the ballnut extends beyond cavity allocated for
the stock nut, the ballscrew was extended roughly 3/4" inch beyond the
length of the stock acme screw. |
 |
| however, there's now reduced travel.
there are workarounds, but this will require the
removal of some cast iron in the table/base. |
 |
| now this is fast! here is a small clip of rapid
movement (not suggested for real world use, but fun to see nonetheless)
the x-axis is next... |
click for
video |
| here's an email that was sent to the grizhfminimill
yahoo group recently on the road test of the three setups (some of the
email has been stripped off):
Display all
headersTo: GrizHFMinimill@yahoogroups.com
From: figNoggle <zzz@zzznoggle.zzz>
Date: Sat, 11 Mar 2006 10:07:25 -0800 (PST)
Subject: Re: [GrizHFMinimill] Re: Mini Mill X Y backlash
Reply-To: GrizHFMinimill@yahoogroups.com
well, here's an update/"road test" of the acetal nut performance and yet
another upgrade to ballscrews... (and one very long read)
INTRO
i had some leftover ground 5tpi ballscrew and a spare non-preloaded
ballnut and decided to go all the way and test how the ground ballscrew
and
non-preloaded nut setup would compare to the rest of the setups (stock
acme and brass nut, upgraded acme and acetal nut).
ACETAL SETUP
the x-axis acetal nut has held up well since installed and used for ~100
hours off/on with docs up to .060" with a 1/2" roughing end mill in 6061
al. the primary reason here is that the acetal nut was prepared for the
tap with ~90% thread contact as spec'd by the machinery's handbook.
the y-axis acetal nut was more crudely prepared and exhibited noticable
backlash on the order .007"+. the screws themselves have held up (as you
would imagine since it's plastic/metal contact)
the good news is that the wear on the nuts has not shown as indicated by
1" travel tests with the indicator and dro (also had to make sure the dro
was reading true and it does). travel, while backlash-prone is still
consistant and repeatable during this time. thus, backlash was a result of
the preparation of the tapped holes for the acme screws.
BALLSCREWS
i may be stating the obvious here but the preliminary tests of the
ballscrew setup is quite impressive. _very_ fast rapids (probably not
recommended), repeatable within .001" (actually for the tests i ran, i'd
say it's less than that, but the dial caliper resolution is .001" and i
wouldn't want to go as far as saying that half a tick is exactly .0005"),
backlash was .002" at most.
there may be a cheap way of reducing this without going with full
preloaded nuts by increasing the size of the balls by a hair.
the downside to the ballscrew setup is that in the y-axis, your travel is
reduced by 1/4" or so due to the interference between the nut and base
based on the simple method of creating a straight flange to mount the nut
to. as such, you could grind out the base some more to create a relief and
regain your travel. alternatively, a more involved flange could be made
such that the body of the nut doesn't extend as far out.
i like the accuracy of the ballscrews, but for manual machining, i still
prefer the acetal nut the best as it offers a balance of "feedback" and
resistance while being of higher accuracy than the stock setup. the other
disadvantage of the 5tpi ballscrew is that a hair of a turn of the
handwheel yields usually a .002" jump in linear travel. it's difficult to
get the operator (me in this case) to consistently move in .001"
increments. this can be avoided by getting smaller lead screws, but the
cost then also goes up since 5/8" dia. 5tpi ballscrews are the most
inexpensive of the lot.
STOCK SETUP
as for the stock screw and brass nut, the brass nut came with considerable
backlash on the order of .015"+ even after tightening the nut down, etc.
the improvement here is to make your own or modify the existing nut.
having already modified the nuts, i can tell you that their lifespan
decreases pretty quickly and to get them to this state usually means some
serious binding on the extremes of bed travel. just my experience here,
others may have gotten theirs to work and last.
VERDICT:
($=cheapest, $$$ most expensive)
-stock screw and brass nut - keep them if no cnc and backlash is ok (btw,
i agree with ray here, get a dro and backlash at the handwheel really no
longer matters as far as table positioning is concerned). cost = $0.
-upgraded acme and acetal nut - good balance for use between manual and
cnc. downside is cost of taps to make them yourselves. affordable
in-between solution. straight-forward self-install. cost = $$
-ground/rolled ballscrews and non-preloaded/preloaded nuts - excellent for
cnc, ok for mannual machining, high cost. more work designing a good
solution that doesn't restrict travel and require machining to the mill
itself. cost = $$$
FINAL THOUGHTS
one final note (thanks to "j" who pointed this out to me), i initially
ordered a left hand screw/tap for the x and y axes thinking that the y was
the same as the x. this was an incorrect assumption (should have
checked..). the y has a LH and the x has a RH. so for any of the above
configurations your cost should at least double to get your mill to
operate as stock. with cnc, not a problem since this is configurable. with
manual, you'll have to retrain your brain to operate one of your axes in
reverse mode. |
| click here to
see the X-axis |
|
|

Looking for mini-mill help and how-tos? How about lathe help and how-tos? We're prototyping a benchtop CNC vertical mill using the DigiSpeed-XL interface card for Mach, Dart Controls and KB Electronics KBIC/KBMM 90VDC motor controllers, 1.5HP treadmill motor from Surplus Center and a R8-spindle head from the X2 mini-mill - not to mention Gecko servo drives and an entirely closed-loop system. Come take a look!CNC 8x12 Lathe
Check out our newest developments like the CNC/DRO 8x12/8x14 lathe using Gecko drives, break-out board, NEMA 34 step motors, DRO and more!
SUPERX3.COM
Sieg X3 and Super X3 Grizzly G0463 Info MDAHacks.com
T-Mobile MDA / Cingular 8125 / HTC Wizard Hacks, Tweaks, Tips, Tricks and More!
Metal Working FAQ.NET
Your source for metalworking and machining, tips, tricks, and more. Over 50 content wiki sites!
|